
Content Index
- Laragon, the easiest environment for developing in Laravel
- Problems when starting with Laravel
- About Laragon to develop apps in Laravel
- Verify Installations: Composer
- Install laravel/installer
- Laravel Installer Update
- Laravel Installer Update
- Official Laravel 13 Visual Studio Code Extension
- Requirements and compatibility
- ⚠️ Caution with fake extensions
- Infinite Starter Kits in Laravel Thanks to the Community - Filament, Svelte, Wave and much +
- What does it consist of?
- How it's used
- How to fix Laravel command not found for zsh on MacOS
- How to fix Problem with the pdo_sqlite extension
In this entry we are going to talk about the UNofficial environment that is perfect for developing our applications if you are using Windows, which cannot be other than the one known as Laragon; this peculiar tool brings us everything necessary to develop our applications in this popular framework for PHP; first, let's see what Laragon is.
Laragon, the easiest environment for developing in Laravel
Laragon is a tool for developers that allows you to create different web development environments; not only for Laravel, but you can use it for other technologies such as PHP with other frameworks, Node, Python, Java, Go, Ruby and much more. Laragon runs on Windows, and is created to work with web applications in the Laravel framework; that is, as soon as we download the installer, we will be able to create projects in Laravel from now on without the need to install additional dependencies.
And as a reward, Laragon provides an isolated development environment, which means that it does not make changes at the Operating System level, otherwise it lives in a separate folder from the Operating System, therefore, you can have other solutions such as XAMPP and enable one or the other.
In addition, Laragon is fast and powerful and allows you to deploy projects with a single click; In the case of Laravel, when restarting the server, the clean URL is automatically generated by an Apache Virtual Host of the PHP projects, including Laravel, therefore, we already have the access URL to the project. Furthermore, Laragon is an interesting option for those developers looking for a solution to work with PHP on Windows; since, it even installs a friendlier console than the Windows CMD to develop.
Problems when starting with Laravel
One of the drawbacks that Laravel has is its learning curve or the first contacts we have with the framework, what happens from installation to taking the first steps with it; the installation of the framework ecosystem goes through several steps of complexity that goes from the range of technologies that it can cover that goes from our LAMP to reaching the entire Node ecosystem until reaching the installation of the environment to develop our applications in any OS.
In the case of Windows, it is not particularly easy to install this entire ecosystem (although it is not as simple as expected in MacOS either) whose official steps involve installing a virtualization of the system, that is, installing a virtual machine based on Ubuntu.
Luckily, there is a tool known as Laragon, which brings us everything we need to develop our applications in Windows.
As I told you before, to develop our applications in Laravel, we require multiple tools, a set of tools that we have to have installed on our computer and Laragon basically offers us a package of all these tools, so, in a few words, with With just one installer, we can have the entire necessary ecosystem.
About Laragon to develop apps in Laravel
On the official website you can see all the features and technologies that this tool offers us:
- PHP
- Apache
- Nginx
- MySQL
- Node
- A decent terminal
- Among other things
Install Laragon on Windows
Installing Laragon has been the usual; download and install:
Here I recommend the full version (Laragon Full) that weighs about 130Mb
Remember to give it permissions on the OS, since it must touch system files when generating projects, such as the Windows host that has to match the generated virtualhost that is necessary when generating the clean URL to be able to develop our applications in Laravel.
Verify Installations: Composer
Now with our Laragon fully loaded, let's do some testing to install the Laravel installer even if it sounds redundant...
Install laravel/installer
On the official Laravel page, you can find all the information you need to start developing your applications in Laravel; among that pertinent information we have the necessary ecosystem (our Laragon works perfectly for us) and how we can install Laravel.
To install Laravel you have to open your Laragon terminal and run the following composer command:
$ composer global require laravel/installerAnd position yourself on the www folder of your Laragon (in case you are no longer there):

Which would be the one we use to install the Laravel installer according to the official documentation:
And with this, we are ready to create our first project; for that we execute:
$ laravel new laratestAnd if we restart our Laragon (turn off the services and start again) we are ready to see our brand new project in the browser:
http://laratest.test/
Where the url is basically the name of your project with the extension of .test
Laravel Installer Update
Laravel Installer is a command line tool that allows you to easily install Laravel on your computer; Of course, for this, first remember to have your development environment installed, such as Laragon or Sail, which you will also find articles in this blog. When you run the command:
$ composer global require "laravel/installer" The latest stable version of the Laravel Installer is downloaded and installed on your system. You can then create a new Laravel project using the command:
$ laravel new <nombre_del_proyecto> The necessary files from the Internet that make up our Laravel project will automatically begin to be downloaded and with this, our Laravel project will be automatically created without doing anything else.
Keeping the Laravel installer up to date is important since many times the latest versions of the framework require having an updated version of it.
Laravel Installer is a command line tool that allows you to install Laravel on a PC previously configured using Laragon, Sail, etc; When you run the command:
$ composer global require "laravel/installer"The latest stable version of the Laravel Installer is downloaded and installed on your system. You can then create a new Laravel project using:
$ laravel new <name_proyect> And wait for the process to finish, in which the necessary files will begin to be downloaded from the Internet to create a project in Laravel and with this, create our project in Laravel ready to use. Like everything, sometimes it is necessary to update its version, let's see a simple mechanism to do it.
Installing the new Laravel installer using Composer is easy, but what if you already have it installed? The latest Laravel installer will be essential for your workflow, so make sure you get the latest version. If you're scratching your head, we've got you covered!
Laravel Installer Update
If you already have globally required laravel/installer on your local machine, you can update to the latest version of laravel/installer by uninstalling and reinstalling it:
$ composer global remove laravel/installer
$ composer global require laravel/installer
Official Laravel 13 Visual Studio Code Extension
As an Editor, I recommend Visual Studio Code with its official extension.
This means it is no longer necessary to install 40 different extensions from various developers. In principle, you only need this one, which centralizes the essential functionalities for working with Laravel.
Although, in my case, I also had to install the Laravel Blade formatter, because for some reason the official extension didn't recognize it correctly yet (even though according to the description it should). Even so, it's a huge step forward to have an official and unified package.
Requirements and compatibility
Keep in mind that this extension requires PHP 8 or higher, which makes perfect sense, as the minimum supported version for the latest versions of Laravel is PHP 8.2.
⚠️ Caution with fake extensions
A very important point: make sure you install the correct extension, from the official link above.
Many malicious extensions are currently appearing on the Marketplace, so always check the editor identifier, which must be:
laravel.vscode-laravel
This way, you ensure that you are installing the official extension from the Laravel team and not a fake or potentially dangerous copy.
Infinite Starter Kits in Laravel Thanks to the Community - Filament, Svelte, Wave and much +
When creating a project in Laravel, we have several flavors or configurations that we can use.
This functionality allows us to directly indicate the "template" or base boilerplate we want to use, leveraging existing community projects.
What does it consist of?
Basically, anyone can create their own Laravel installation, modify it by adding the packages, configurations, or structures they consider useful, and then share it as a reusable template.
This way, we can clone and create a new project based on that template with a single command.
How it's used
When creating the project, we simply use the --using option followed by the repository that contains the template:
$ laravel new example-app --using=<REPO>For example, if we want to use a specific template hosted on GitHub, we just have to indicate the repository URL.
Practical example
An example of a repository that implements this functionality is the following:
https://github.com/tnylea/laravel-new
In short, instead of manually cloning a project you found online, you can now do it directly from the Laravel creation command, which makes the process much faster and cleaner.
How to fix Laravel command not found for zsh on MacOS
The terminal commands are great in the Laravel ecosystem since they allow you to create the project to be able to manage different parts of it; when we install the Laravel installer globally with composer, many times it is not recognized as a valid command until we add it to the path; let's see how to do it.
To allow the use of commands beginning with 'laravel', you will need to edit your .zshrc file; usually this happens when executing the laravel installer:
laravel new proyectolaravelThis file should be in your home folder.
First, check if the file exists:
open -e ~/.zshrc
Next, add the following code to the bottom of your .zshrc file:
PATH="$HOME/.composer/vendor/bin:$PATH"Save the file. The changes will now be implemented in any new terminal session. Please stop the current session or run the code below, and then it will work for the current session as well:
source ~/.zshrcHow to fix Problem with the pdo_sqlite extension
It is important to point out that you must have at least PHP version 8.3.3 to work with Laravel 11; on my YouTube channel, I explain how you can configure Laragon with PHP 8.
For the rest, Laragon already brings us everything we need to start working on Laravel.
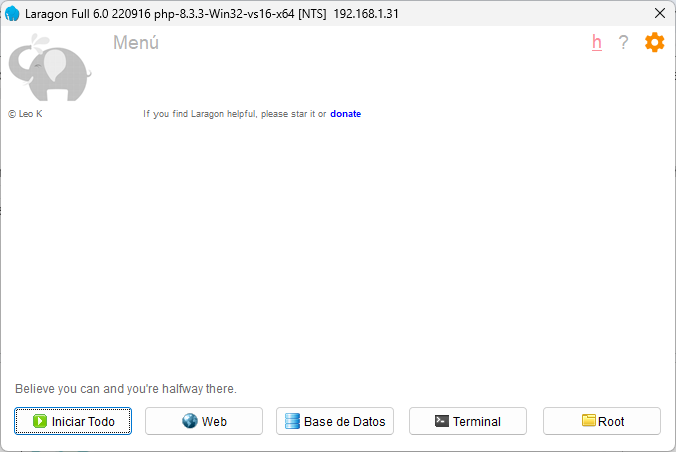
From the button that says ”Start All”, you start both Apache and MySQL (which you must do in order to work with Laravel); so, if you have another LAMP environment enabled on your computer, first, you must download said services and then up the service with the aforementioned button:

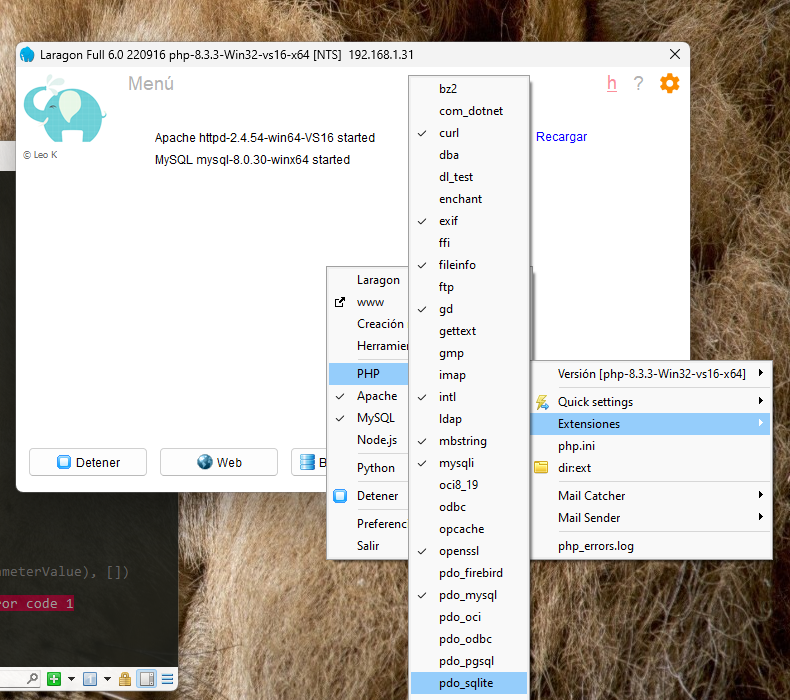
In addition to installing Laragon, you must enable the following "pdo_sqlite" extension:
Or when creating the project in Laravel it may stop with an error or when starting the server an error like the following:
could not find driver PRAGMA foreign_keys = ON;And it is because you must enable the previous extension.
On linux, you can install the following dependency:
$ sudo apt-get install php-sqlite3And it is to prevent it from throwing an error like the following:
   INFO  Application key set successfully.

    > @php -r "file_exists('database/database.sqlite') || touch('database/database.sqlite');"
    > @php artisan migrate --ansi

   Illuminate\Database\QueryException

  could not find driver (Connection: sqlite, SQL: PRAGMA foreign_keys = ON;)

  at vendor\laravel\framework\src\Illuminate\Database\Connection.php:813
    809                     $this->getName(), $query, $this->prepareBindings($bindings), $e
    810                 );
    811             }
    812
    813           throw new QueryException(
    814                $this->getName(), $query, $this->prepareBindings($bindings), $e
    815             );
    816         }
    817     }
In addition to installing Laragon, you must enable the following "pdo_sqlite" extension:
Although Laragon was great, it's now a paid tool and is listed as just another option, but for modern development, I recommend Laravel Herd for developing Laravel applications.