
With the rise of smart mobile devices, there is a multitude of web applications that use user geolocation to offer content tailored to their area, such as Twitter, Facebook, and various Google services.
Geolocation has become one of the most useful features in modern web applications. From interactive maps to location-based recommendations, JavaScript offers a simple—yet powerful—way to access the user's position using the Geolocation API.
In my case, I came to master this API because I used it in my thesis, where I needed to display artworks distributed throughout the University City. That was when I discovered fine details like permissions, accuracy, and the different behavior between mobile and desktop devices.
What is geolocation in JavaScript and how does it really work?
The HTML5 Geolocation API allows retrieving the user's geographical position directly from the browser, provided that three fundamental conditions are met:
- The browser supports it (all modern ones do).
- The user grants explicit permission.
- The site is under HTTPS (mandatory in modern browsers).
How your browser obtains location (GPS, WiFi, and mobile networks)
The browser does not rely on a single source: it combines various technologies to estimate the user's position with the highest possible accuracy. The sources it uses, from highest to lowest accuracy, are:
- GPS: very accurate, ideal on mobile devices with a GPS chip.
- Nearby WiFi networks: good accuracy indoors and in dense urban areas.
- Cell towers: medium accuracy, useful when neither GPS nor WiFi is available.
- User's IP address: the least accurate, only approximates the city or region.
In my thesis project, for example, I noticed that indoors the accuracy dropped considerably, so I had to enable high accuracy mode (enableHighAccuracy: true) to get better results right when I was standing in front of an artwork.
Requirements: HTTPS, user permissions, and compatibility
- Without HTTPS, modern browsers completely block access to the API.
- The user can accept or reject the location request at any time.
- Not all devices respond the same way or with the same accuracy.
The geolocation API in JavaScript
With the Geolocation API we can know the user's geographical location, as long as the browser has implemented this API and the user grants permission to access their position. Access to this API is done through the global navigator object.
How do we use the geolocation object?
The geolocation API is accessible via the navigator object in the following way:
navigator.geolocation
Before working with this API, we must keep two important considerations in mind: checking if the browser supports it and being prepared to handle permission denials by the user.
How to check if the Geolocation API is available
Checking whether the user's browser implements this API is essential to prevent runtime errors in the script. The check is performed as follows:
if (navigator.geolocation) {
    /* geolocation is available */
} else {
    /* geolocation is not available */
}
An equally valid equivalent, using the in operator, would be:
if ("geolocation" in navigator) {
    /* geolocation is available */
} else {
    /* geolocation is not available */
}
The user can deny or allow access to their location at any time. For this reason, it is recommended that geolocation not be a mandatory feature to use the application, but rather a progressive enhancement of the experience.
For both cases, it is necessary to perform the corresponding validations. The handling of the second scenario (request denial) will be covered in detail later, in the error handling section.
Typical behaviors in desktop vs. mobile
- Desktop: relies more on WiFi and IP address, so accuracy is usually lower.
- Mobile: excellent accuracy thanks to integrated GPS, although it consumes more battery when
enableHighAccuracyis active.
When I ran tests at the University City for my thesis, I got differences of several meters between the laptop and the mobile phone. This detail is critical if you work with exact points such as sculptures, murals, or guided routes.
How to get the user's location with navigator.geolocation.getCurrentPosition()?
We can access the user's location if and only if the user has allowed us access and the browser supports the API. This is done via the getCurrentPosition() method:
navigator.geolocation.getCurrentPosition(
  showLocation,
  handleError,
  {
    enableHighAccuracy: true,
    timeout: 5000,
    maximumAge: 0
  }
);
With the getCurrentPosition() method we retrieve the user's current geographical location. The location is expressed in geographical coordinates and is returned inside a GeolocationPosition object (formerly called Position).
Basic example: getting latitude and longitude
In this example we see how to extract latitude and longitude from the position object received by the success callback:
function showLocation(position) {
  console.log("Latitude:", position.coords.latitude);
  console.log("Longitude:", position.coords.longitude);
}
Syntax of the getCurrentPosition() method
navigator.geolocation.getCurrentPosition(successCallback, errorCallback, options);Parameters of the getCurrentPosition() method
successCallback: function that will receive the user's location information via aGeolocationPositionobject. It is the only mandatory parameter.errorCallback: (optional) function that will receive aGeolocationPositionErrorobject if any error occurs while obtaining the location.options: (optional) configuration object that accepts the following properties:enableHighAccuracy: boolean indicating whether the application will try to get the most accurate location estimate possible. Defaults tofalse; setting it totruecan increase response time and battery consumption.timeout: maximum time in milliseconds that the method will wait before invokingerrorCallback. Applies to bothgetCurrentPosition()andwatchPosition().maximumAge: maximum time in milliseconds during which a cached position can be reused. If0, the browser will always try to get a fresh position.
Complete error and permission handling in the Geolocation API
The GeolocationPositionError object received by errorCallback exposes a code property with three possible constant values that allow identifying exactly what went wrong:
GeolocationPositionError.PERMISSION_DENIED(code1): the user denied permission to access location.GeolocationPositionError.POSITION_UNAVAILABLE(code2): it is not possible to determine the user's position (no GPS, no WiFi, etc.).GeolocationPositionError.TIMEOUT(code3): the operation exceeded the maximum time defined intimeoutwithout obtaining a position.
A complete error handler would look like this:
function handleError(error) {
  switch (error.code) {
    case error.PERMISSION_DENIED:
      console.error("The user denied access to location.");
      break;
    case error.POSITION_UNAVAILABLE:
      console.error("Location information is unavailable.");
      break;
    case error.TIMEOUT:
      console.error("The location request timed out.");
      break;
    default:
      console.error("An unknown error occurred.");
  }
}
How to improve accuracy without affecting performance
Enabling enableHighAccuracy: true forces the device to use GPS, which improves accuracy but can slow down the response. A balanced combination for most use cases is:
{
  enableHighAccuracy: true,
  timeout: 7000,
  maximumAge: 10000
}
With this configuration we give the device up to 7 seconds to respond and allow reusing a position up to 10 seconds old, avoiding unnecessary GPS calls.
Real-time geolocation with watchPosition()
If you need to track location continuously (for example, when walking between campus buildings or during turn-by-turn navigation), the watchPosition() method is your ally. Unlike getCurrentPosition(), this method continues executing the callback every time the user's position changes:
const watchId = navigator.geolocation.watchPosition(
  showLocation,
  handleError,
  { enableHighAccuracy: true, timeout: 7000, maximumAge: 0 }
);
To stop tracking when it is no longer needed, use clearWatch() passing the returned ID:
navigator.geolocation.clearWatch(watchId);Key differences between getCurrentPosition() and watchPosition()
getCurrentPosition(): gets the position only once and stops execution.watchPosition(): keeps listening and triggers the callback every time the position changes.
Cases where watchPosition() is truly worth it:
- Interactive routes and real-time navigation.
- Step-by-step guided tours (like the artwork guide I developed).
- Physical activity or sports monitoring.
At the University City I used
watchPosition()during internal testing to check how fast the system reacted when walking from one artwork to another. The result: on mobile with active GPS, the response was almost immediate.
Example 1: Basic geolocation with JavaScript
To get the user's position with getCurrentPosition(), we first verify that the API is available and then invoke it, passing the function that will receive the GeolocationPosition object as a callback:
if (navigator.geolocation) {
  navigator.geolocation.getCurrentPosition(function (position) {
    const lat = position.coords.latitude;
    const lng = position.coords.longitude;
    console.log("Latitude:", lat);
    console.log("Longitude:", lng);
  });
} else {
  console.warn("The Geolocation API is not available in this browser.");
}
As you can appreciate, we first check if the geolocation API is available and then request the user's location. Only if the browser supports it do we proceed to call getCurrentPosition(), passing the anonymous function that will receive the position object with the coordinates.
Example 2: Geolocation with comprehensive error handling
In this more elaborate example we type the errors that can occur to provide clear feedback to the user. This is the pattern you should always use in a real project:
if (navigator.geolocation) {
  navigator.geolocation.getCurrentPosition(
    function (position) {
      console.log("Latitude:", position.coords.latitude);
      console.log("Longitude:", position.coords.longitude);
    },
    function (error) {
      switch (error.code) {
        case error.PERMISSION_DENIED:
          alert("Permission denied. Please enable location in your browser.");
          break;
        case error.POSITION_UNAVAILABLE:
          alert("Could not determine your location.");
          break;
        case error.TIMEOUT:
          alert("The request took too long. Please try again.");
          break;
      }
    },
    {
      enableHighAccuracy: true,
      timeout: 7000,
      maximumAge: 10000
    }
  );
} else {
  alert("Your browser does not support the Geolocation API.");
}
Geolocation with JavaScript and Google Maps
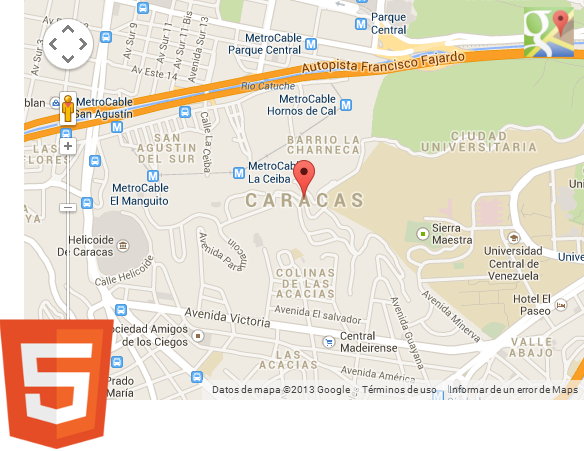
Google Maps is an exceptional tool for visualizing draggable maps, calculating routes between different points, and integrating points of interest. Its JavaScript API is available for our web projects and integrates seamlessly with the Geolocation API to create rich, contextual map experiences.
Showing the user's location on a map (Leaflet or Google Maps)
A geolocation application without a map feels incomplete. There are two main options to integrate it: Leaflet (lightweight, free, and open-source) or the Google Maps JavaScript API (more powerful, requires an API key). In my thesis I used Leaflet for its ease of use and because it incurs no cost.
Loading a marker at a static point with Leaflet:
L.marker([lat, lng]).addTo(map)
  .bindPopup("Artwork");
Centering the map on the user's current position:
map.setView([userLat, userLng], 16);Integration with Google Maps JavaScript API
In my project I integrated both my current position and the points of all campus artworks, which allowed comparing distances and planning routes intuitively.
First, we obtain the user's location and store it in a coordinate object:
const myLatlng = {
  lat: position.coords.latitude,
  lng: position.coords.longitude
};
Then we include the Google Maps JavaScript API script in our HTML document. Replace YOUR_API_KEY with your real API key:
<script async defer
  src="https://maps.googleapis.com/maps/api/js?key=YOUR_API_KEY&callback=initMap">
</script>- The
asyncanddeferattributes guarantee non-blocking loading of the script. - The
callback=initMapparameter indicates that theinitMap()function will execute automatically once the API has finished loading. - The old
sensor=falseparameter is no longer necessary and can be omitted.
Next, we include the HTML container where the map will be rendered:
<div id="map_canvas" style="width:500px; height:500px"></div>The map can have any dimension; for this example we use 500px × 500px. The important thing is that the div has explicit dimensions, otherwise the map will not render.
Then we build the map options object:
var mapOptions = {
  zoom: 8,
  center: { lat: myLatlng.lat, lng: myLatlng.lng },
  mapTypeId: google.maps.MapTypeId.ROADMAP
};
The map types available in the Google Maps JavaScript API are:
MapTypeId.ROADMAP: displays the default road map view.MapTypeId.SATELLITE: displays Google Earth satellite images.MapTypeId.HYBRID: combines the road view with satellite images.MapTypeId.TERRAIN: displays a physical map based on relief topography.
The available zoom levels range from 0 (zoomed out farthest, the whole world) to 21 (maximum detail).
Finally, we build and initialize the map:
var map = new google.maps.Map(document.getElementById("map_canvas"), mapOptions);Google also promotes a more modern pattern using async/await with dynamic library import, which avoids using the global callback and is the recommended way in new projects:
let map;
async function initMap() {
  // Dynamically import the 'maps' library
  const { Map } = await google.maps.importLibrary("maps");

  map = new Map(document.getElementById("map_canvas"), {
    center: { lat: myLatlng.lat, lng: myLatlng.lng },
    zoom: 8,
  });
}
Geolocation best practices in real projects
Beyond making the API work, these are the practices that make a difference in a professional project:
- Ask for permissions in context: request location only when the user performs an action that requires it (e.g., clicking "See stores near me"), not upon page load.
- Use
enableHighAccuracysparingly: enable it only when accuracy is critical for the functionality. - Explain why you need it: inform the user of the reason before triggering the browser prompt. This increases the acceptance rate.
- Always handle all errors: never leave
errorCallbackempty or unimplemented. - Do not make geolocation mandatory: if the user denies it, your application should continue working, albeit with reduced features.
How to add markers (POIs) in Google Maps?
We will see how to add POIs or markers in Google Maps. Basically we must follow the steps we already know (create the map, define coordinates and options) and then instantiate the google.maps.Marker class. Below is a complete example:
// The function is called automatically after loading the API.
function DrawMap() {
    // 1. Coordinates (using lowercase 'lat' and 'lng' as numbers)
    const myLatlng = {
        lat: 10.49063,
        lng: -66.886965
    };
    // 2. Map options
    var mapOptions = {
        zoom: 15,
        center: myLatlng,
        mapTypeId: google.maps.MapTypeId.ROADMAP
    };
    // 3. Map construction
    var map = new google.maps.Map(
        document.getElementById("map"),
        mapOptions
    );

    // 4. Add a Marker (POI)
    new google.maps.Marker({
        position: myLatlng, // Marker position
        map: map,           // The map where it will be drawn
        title: "My first location!"
    });
}
The flow is always the same: we set the coordinates, configure the map options (initial zoom, center, and type with mapTypeId), construct the map passing the container div via document.getElementById("map"), and finally instantiate the Marker with its position, the target map object, and a descriptive title.
Conclusion
The Geolocation API is simple to use, but getting the most out of it requires understanding permissions, accuracy, performance, and error handling. In my experience developing the University City artwork guide, these details made the difference between a "pretty" map and a truly useful tool for the visitor.
With this article we have covered everything from basic access to navigator.geolocation to integration with Google Maps and real-time tracking with watchPosition(). This is one of the many features that HTML5 provides us to build smarter, more contextual web applications, aimed at providing better experiences for the end user.
Geolocation API in JavaScript: Complete Guide with Practical Examples Learn how to use the JavaScript and HTML5 Geolocation API to get the user's location with navigator.geolocation. Real examples with getCurrentPosition(), watchPosition(), and Google Maps.