Getting Started with Wikitude for Android: Installing the SDK and Getting Started with Image Recognition
- Andrés Cruz

It explains how to create an application for image recognition together with augmented reality using the Wikitude native SDK for Android
It explains how to create an application for image recognition together with augmented reality using the Wikitude native SDK for Android
And the entry before this; in this post we will see how to create an application that uses the Wikitude naiva SDK for Android and uses image recognition to (excuse the redundancy) recognize an image and display a frame around it.
In those days when there was the famous Eclipse with the ADT plugin, since then several things have changed, many versions of Android have passed, several of the Wikitude SDK up to version 8, which is the current one, and they have even extended their SDK to create a native one for Android.
The native SDK and the web/JavaScript SDK
Let's remember that for previous versions only a kind of hybrid SDK was available where part of the SDK was native (the use of the camera and initial configuration), but the strength of image recognition, use of POIs or Points of Interest, interaction with the user, connecting to other APIs to fetch or send data, and more, was done using JavaScript; In my humble opinion, this scheme seems excellent since it greatly facilitates the app creation process, we can work largely with libraries and other web functionalities that from Android would make us spend more work because of how it is prepared.
However, the Achilles heel of this functionality is that the interfaces, being webs, are not up to the standard of native Android development; for this, Wikitude created a native version for Android parallel to the JavaScript one that we can use according to our needs:
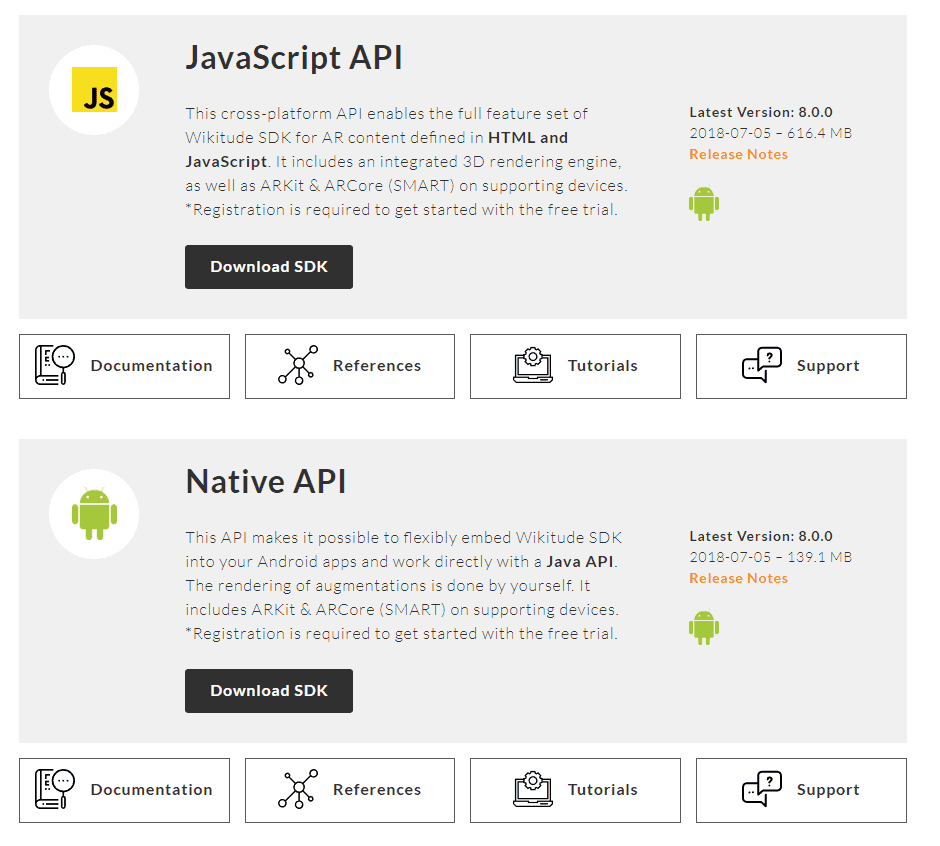
The Wikitude SDKs for Android and others can be downloaded from the following official link:
Wikitude SDK para Of course, developing with the native SDK can be more complex than with the web SDK, but it all depends on the advantages that we see between one and the other when carrying out a project.
In this post, we will focus on taking the first steps with the development of a simple application for image recognition, for this we will make use of the official examples almost in their entirety, but the idea of this post is to narrate how I developed and tested these examples in a cleaner way, explain how it works and how we can help each other with the documentation.Android
Installing the native SDK
The first thing to do is download the native Wikitude SDK for Android; for this you can download it from the download section:
You probably have to register, accept some conditions etc; once downloaded, you unzip them and we will have in the path:
WikitudeSDK_NativeAPI_Android_8-X-X_XXXX-XX-XX_XX-XX-XX\Library
This Wikitude library or SDK that we will install in our Android Studio; the process consists of copying the library in the Android libs folder:
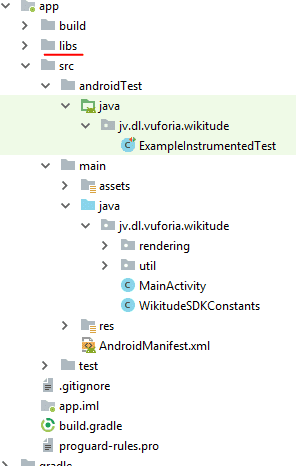
And then follow the steps that are narrated in the official documentation:
It basically consists of adding the dependencies in our Android Gradle:
android {
    ...
}

dependencies {
    implementation fileTree(dir: 'libs', include: ['*.jar'])
    implementation (name: 'wikitude-native-sdk', ext:'aar')
    implementation "com.google.ar:core:1.1.0"
    ...
}

repositories {
    flatDir{
        dirs 'libs'
    }
}
And in requesting the permissions in our Android Manifest:
<uses-permission android:name="android.permission.CAMERA" />
<uses-permission android:name="android.permission.WRITE_EXTERNAL_STORAGE" />
<uses-permission android:name="android.permission.INTERNET" />

<uses-feature android:glEsVersion="0x00020000" android:required="true" />
<uses-feature android:name="android.hardware.camera" android:required="true" />
Place these attributes in the activity that uses augmented reality, which in our example is our MainActivity:
android:configChanges="orientation|keyboardHidden|screenSize"Remaining our MainActivity which is the one that will show the augmented reality through the camera and the screen of the device in the following way:
<activity
   android:name=".MainActivity"
   android:configChanges="orientation|keyboardHidden|screenSize">
Once this is done, our project should compile without a problem, even though we haven't developed anything yet.
Getting Started with WIkitude Image Recognition
As we mentioned before, we are going to make use of the examples that Wikitude offers, and that come in the zip that we downloaded and unzipped before:
WikitudeSDK_NativeAPI_Android_8-X-X_XXXX-XX-XX_XX-XX-XX\Library\app\src\main\java\com\wikitude\samples\tracking\image\SimpleImageTrackingActivity.java
In the official documentation we can be guided by these links that explain a step by step to a certain point:
He tells us a few steps that consist of implementing some classes of the Wikitude SDK:
public class MainActivity extends Activity implements ImageTrackerListener, ExternalRendering {...}It tells us that in our OnCreate, which is the initial method in our life cycle of an Android application, we make the application configurations, creating the WikitudeSDK object with which we make the configurations to indicate the license that we downloaded from the previous point, the camera that we are going to use, if the front or the back, the resolution, and then we create an instance of the Wikitude SDK with the configured parameters:
wikitudeSDK.onCreate(getApplicationContext(), this, startupConfiguration);Creando el TargetCollection
The next step is to create the TargetCollection that we have already talked about in a previous post:
Target Collection y el ARchitect World en la nube con Wikitude
Using the native Wikitude API, to reference the TargetCollection we do:
targetCollectionResource = wikitudeSDK.getTrackerManager().createTargetCollectionResource("file:///android_asset/magazine.wtc");The android_asset path refers to the assets directory of our project that we can create from Android Studio:
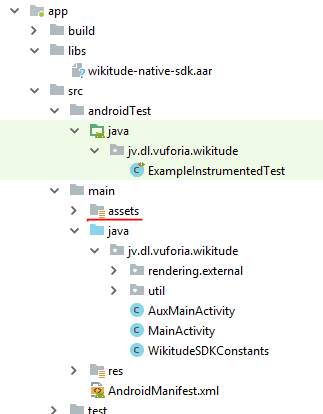
We also add or rather override some of the methods of the class that we are implementing:
@Override
public void onTargetsLoaded(ImageTracker tracker) {
    Log.v(TAG, "Image tracker loaded");
}

@Override
public void onErrorLoadingTargets(ImageTracker tracker, WikitudeError error) {
    Log.v(TAG, "Unable to load image tracker. Reason: " + error.getMessage());
}

@Override
public void onImageRecognized(ImageTracker tracker, final ImageTarget target) {
    Log.v(TAG, "Recognized target " + target.getName());

    StrokedRectangle strokedRectangle = new StrokedRectangle(StrokedRectangle.Type.STANDARD);
    glRenderer.setRenderablesForKey(target.getName() + target.getUniqueId(), strokedRectangle, NULL);
}

@Override
public void onImageTracked(ImageTracker tracker, final ImageTarget target) {
    StrokedRectangle strokedRectangle = (StrokedRectangle)glRenderer.getRenderableForKey(target.getName() + target.getUniqueId());

    if (strokedRectangle != NULL) {
        strokedRectangle.projectionMatrix = target.getProjectionMatrix();
        strokedRectangle.viewMatrix = target.getViewMatrix();

        strokedRectangle.setXScale(target.getTargetScale().getX());
        strokedRectangle.setYScale(target.getTargetScale().getY());
    }
}

@Override
public void onImageLost(ImageTracker tracker, final ImageTarget target) {
    Log.v(TAG, "Lost target " + target.getName());
    glRenderer.removeRenderablesForKey(target.getName() + target.getUniqueId());
}
And the next method, which is very important, allows you to mirror the content of the camera on the screen; in other words: render the camera content on the screen and enable Augmented Reality:
@Override
public void onRenderExtensionCreated(final RenderExtension renderExtension) {
    glRenderer = new GLRenderer(renderExtension);
    view = new CustomSurfaceView(getApplicationContext(), glRenderer);
    driver = new Driver(view, 30);
    setContentView(view);
}
Here, as we can see, things get a bit complicated since we make use of other classes and methods that suddenly appeared in the documentation; The most important thing here is to keep in mind the methods autogenerated by the Wikitude API that are practically self-explanatory with their name, but even so, we are going to define them a bit below:
Now with this help, the best we can do is go through method by method and analyze what it is doing.
onCreate method
In the onCreate method, the next thing we do is request permission to use the camera, and this is typical of Android since version 6, if the request is rejected, then there is nothing to do, since the augmented reality of Wikitude and less recognize images.
Next step these lines of code that are optional:
dropDownAlert = new DropDownAlert(this);
dropDownAlert.setText("Scan Target #1 (surfer):");
dropDownAlert.addImages("surfer.png");
dropDownAlert.setTextWeight(0.5f);
dropDownAlert.show();
What you do is paint a rectangle at the top of the screen:

In the onResume, onPause and onDestroy methods, what we do is control the life cycle of the application and some components that are essential for it to work and not give us an unexpected error when the application goes from one state to another and can be destroyed correctly. .
Types of rendering: External and Internal
We have two types of rendering, the internal and the external and this is what paints enables the camera on the screen (note that now we do not use a special layout that functioned as a mirror between the camera and the screen as it is done in the web version) .
The onRenderExtensionCreated method is defined with the external rendering since we are passing our OpenGL parameter at 30 frames per second.
And at this point is where the magic happens, where Wikitude shows or mirrors the content of the camera on the device screen and enables all the Wikitude SDK at our disposal (Image Recognition, Points of Interest, and augmented reality in general).
GLRenderer class
In general, we don't have to analyze these classes much, knowing that it is the one that builds the view surface or SurfaceView is enough for us to work with it; it is responsible for building the view according to the size of the screen.
GLRenderer implements a couple of classes, the first of which is GLSurfaceView.Renderer that uses the OpenGL library that allows for 2D and 3D graphics and interfaces; Now with this you can assume that these graphics in Wikitude refer to the lens (the screen) that reflects the content sent by the device's camera.
How does Wikitude communicate with this GLSurfaceView.Renderer interface
Well, for that, Wikitude has its own interface called RenderExtension which is initialized in the GLRenderer method as a parameter generated in the overridden method in the main activity called onRenderExtensionCreated; It's that easy, even if it sounds a bit complicated; This RenderExtension interface was created specifically for external rendering of the Wikitude SDK.
The useSeparatedRenderAndLogicUpdates method works in conjunction with the onDrawFrame method to allow the rendering of the application to be updated.
The onSurfaceCreated, onSurfaceChanged and onDrawFrame methods are methods provided by the same GLRenderer interface that are responsible for making changes to the screen and drawing each frame, making changes every time there is an update, etc; With this you see that it is important to make the corresponding calls in the onPause and onDestroy of the activity.
The GLES20 class together with the methods it invokes is simply in charge of cleaning up the buffer; since this is something quite internal to OpenGL that again it is not necessary to work with it to exploit the basic functionalities of the core of the Wikitude SDK.
The rest we see is simply how the Wikitude SDK communicates with the methods provided in OpenGL and works correctly; without any of this, it will not be possible for Wikitude to render the camera frames on the screen, in other words, we would have a blank, black screen or simply the app does not work; it defines through CameraManager.FovChangedListener the onFovChanged method that we see at the end of the code.
The CameraManager interface is provided by Wikitude and allows you to control the camera, which is the input of augmented reality that makes it possible for everything else to work correctly.
Here are some interesting links to the official documentation:
CustomSurfaceView class: builds the view to embed in the activity
The other class that we use in the onRenderExtensionCreated method is the CustomSurfaceView that we pass an instance of the glRenderer class that we explained in the previous section; This CustomSurfaceView class extends the GLSurfaceView class that provides a surface to display an OpenGl rendering (which is what we generated in the previous point), that is, in a class the glRenderer generates the rendering that we want to show through OpenGL and WIkitude and in this class we simply generate the surface with this content and embed it in the activity as if it were a view:
customSurfaceView = new CustomSurfaceView(getApplicationContext(), glRenderer);
***
setContentView(customSurfaceView);
This class in short, what you do is create a context to render and on this a surface to draw using the "EGL rendering context"; already here are two big factors at play that do everything for us OpenGL-Android and Wikitude.
Here in these last points we see the Achilles heel of the native Wikitude API for Android, and that is that some components are more complex like the ones we saw, something that we don't have to deal with in the Wikitude web or JavaScript API for Android .
StrokedRectangle class: Paint frame of recognized target
This class is called from the MainActivity of our activity through the onImageTracked method that obtains the dimensions and position of the recognized object and in the onImageRecognize method that draws the corresponding rectangle on the recognized image (besides this method allows us to obtain the name of the target recognized via target.getName()).
This class draws the rectangle in the onDrawFrame() function of that class; all this is using the OpenGL API which is not the point of interest of this post.
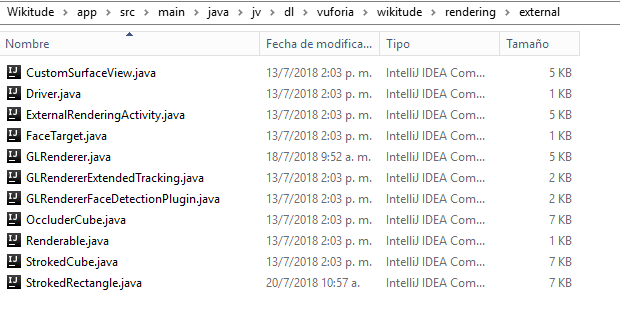
You can consult the complete code in the download links located at the beginning and end of this augmented reality tutorial with Wikitude native SDK and Android; Remember to copy the rendering directory into your application package with its content:
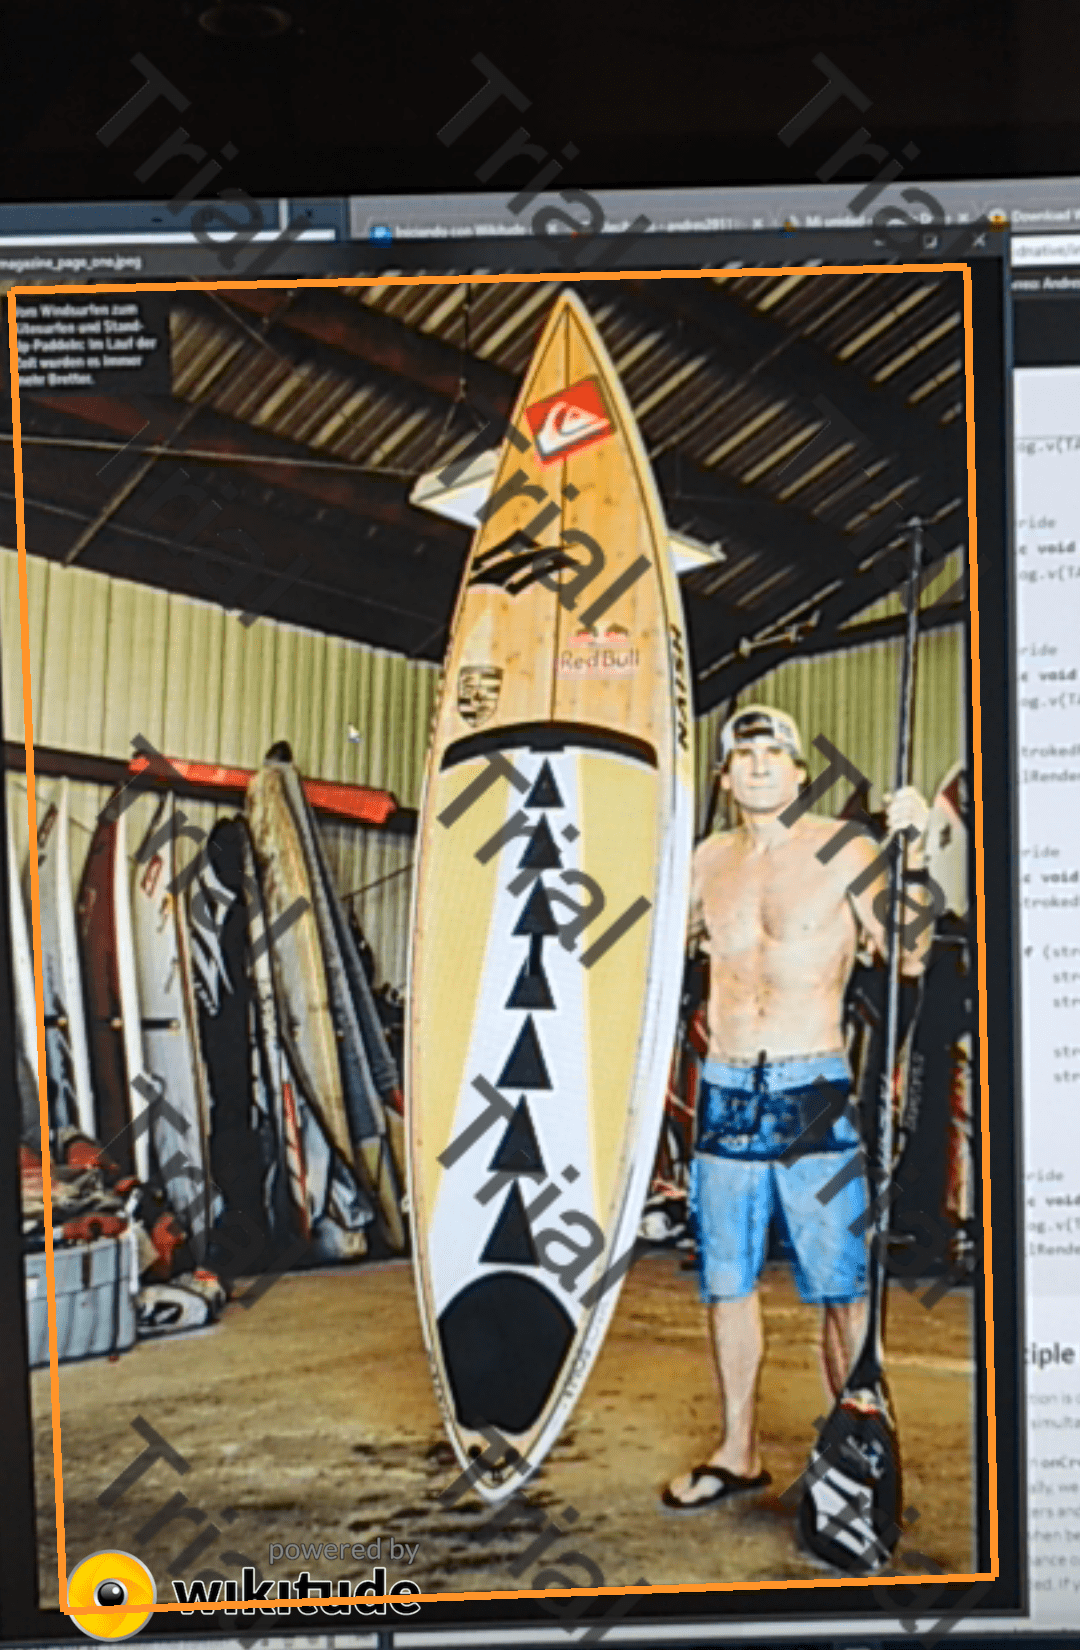
Finally, when running the application and positioning the camera on the next photo; We see that the Wikitude SDK recognizes this image and places a rectangle around it:

Develop with Laravel, Django, Flask, CodeIgniter, HTML5, CSS3, MySQL, JavaScript, Vue, Android, iOS, Flutter


