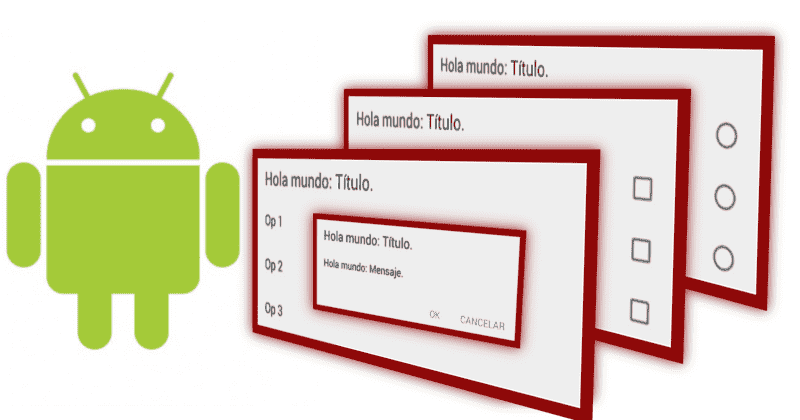
The dialogs (dialogs) in Android are nothing more than a small customizable window through styles and layouts and in the Android SDK it has built-in classes; in this entry we will see the different types of dialogs in Android.
The dialogs (dialogs) in Android are nothing more than a small customizable window through styles and layouts that can be used when making certain options such as selection fields, custom controls, forms and/or displaying some precise information.
The Android SDK has a built-in class accessible via: android.app.AlertDialog and a second built-in support library accessible via android.support.v7.app.AlertDialog.Builder; apart from a visual difference between the two (the one with the support library has a Material Design style), both accounts have different methods that you can consult in the following links:
For the purposes of this entry, it doesn't matter which of the two classes you want to work with -although it is best to use the support library as it brings a greater number of new features and as it is constantly evolving.
Dialogs in Android
In this post we will see the different types of dialogs in Android.
Simple Android message dialog
The simplest of all is made up of a dialogue with a message; to create it in Android it is necessary to use two classes:
- The AlertDialog class to show or hide the dialog.
- The AlertDialog.Builder class to set messages (.setMessage()), title (setTitle()), layout (setView()), style, buttons (setNegativeButton() and setPositiveButton() and setCancelable()), the dialog type (see the other examples) among other aspects.
Here is how to build a simple dialog with a message using the methods seen above:
AlertDialog.Builder builder = new AlertDialog.Builder(this, R.style.DialogLevelsStyle);

builder.setMessage("Hola mundo: Mensaje.")
       .setTitle("Hola mundo: Título.")
       .setPositiveButton(ResourceService.get(R.string.dialog_ok, this), new DialogInterface.OnClickListener() {
           @Override
           public void onClick(DialogInterface dialog, int which) {
    // hacer algo
           }
       });

dialogIcon = builder.create();
dialogIcon.show();
In the previous example, we set an accept button or "positive button" and its listener event via the setPositiveButton() method and the DialogInterface.OnClickListener() interface:
With the show() method we show the dialog.
With the above Java code we get the following result:

As we can see, it is a simple dialogue with a body or message; this can be considered the simplest dialogue that can be built; next we will show other variants of dialogs in Android.
Confirmation dialog in Android
It is also possible to set a deny button and the deny button listener event which is a similar case of the accept button:
AlertDialog.Builder builder = new AlertDialog.Builder(this, R.style.DialogLevelsStyle);

builder.setMessage("Hola mundo: Mensaje.")
       .setTitle("Hola mundo: Título.")
       .setNegativeButton(ResourceService.get(R.string.dialog_ok, this), new DialogInterface.OnClickListener() {
           @Override
           public void onClick(DialogInterface dialog, int which) {
           }
       })
       .setPositiveButton(ResourceService.get(R.string.dialog_cancel, this), new DialogInterface.OnClickListener() {
           @Override
           public void onClick(DialogInterface dialog, int which) {
               if (dialog != NULL) {
                   dialog.cancel();
               }
           }
       });

       dialogIcon = builder.create();
       dialogIcon.show();
The deny button simply closes the dialog via the .cancel() method, but you can do anything else.

Simple selection dialogs in Android
If you want to implement an Interface which requires the user to be able to select one of many options, you must use the setItems() method as follows:
final String[] items = {"Op 1", "Op 2", "Op 3"};

AlertDialog.Builder builder = new AlertDialog.Builder(this, R.style.DialogLevelsStyle);

builder.setTitle("Hola mundo: Título.")
       .setItems(items, new DialogInterface.OnClickListener() {
           @Override
           public void onClick(DialogInterface dialog, int item) {
               Log.i("Dialog", "Op: " + items[item]);
           }
       });

dialogIcon = builder.create();
dialogIcon.show();
Simple select dialogs with radio in Android
Another variation on the previous example is to use selectors similar to radios in HTML:
final String[] items = {"Op 1", "Op 2", "Op 3"};

AlertDialog.Builder builder = new AlertDialog.Builder(this, R.style.DialogLevelsStyle);

builder.setTitle("Hola mundo: Título.")
       .setSingleChoiceItems(items, -1, new DialogInterface.OnClickListener() {
           @Override
           public void onClick(DialogInterface dialog, int item) {
               Log.i("Dialog", "Op: " + items[item]);
           }
       });

dialogIcon = builder.create();
dialogIcon.show();
Multi-selection dialogs in Android
Now, if instead of an option it is necessary for the user to select one or more options, we must use the setMultiChoiceItems method:
final String[] items = {"Op 1", "Op 2", "Op 3"};

AlertDialog.Builder builder = new AlertDialog.Builder(this, R.style.DialogLevelsStyle);

builder.setTitle("Hola mundo: Título.").setMultiChoiceItems(items, NULL,
       new DialogInterface.OnMultiChoiceClickListener() {
           public void onClick(DialogInterface dialog, int item, boolean isChecked) {
               Log.i("Dialog", "Op: " + items[item]);
           }
       });

dialogIcon = builder.create();
dialogIcon.show();
Custom dialog in Android
Through the setView() method we can define a custom layout as if it were another Interface, in this way the dialog becomes a powerful tool to create more complex tools that require the user to lock the screen through the dialog:
        AlertDialog.Builder builder = new AlertDialog.Builder(this, R.style.DialogLevelsStyle);
        LayoutInflater inflater = getLayoutInflater();

        builder.setView(inflater.inflate(R.layout.list_audio_adapter, NULL))
                .setPositiveButton("OK", new DialogInterface.OnClickListener() {
                    public void onClick(DialogInterface dialog, int id) {
                        dialog.cancel();
                    }
                });

        dialogIcon = builder.create();
        dialogIcon.show();
